Jaclyn, of Food Plus Words, is back with her monthly dose of deliciousness. Stop by her site for great recipes and writing! Here’s Jaclyn:
Howdy, everyone!
Can you believe we’re already at the end of January? The new year just began, and it’s already flying by!
If there’s one thing I always start thinking about when the first month of the year comes to a close, it’s Valentine’s day. No, I don’t daydream about flowers or muse about what types of chocolate a secret admirer might leave on my doorstep (Godiva, please!). My favorite thing about Valentine’s day is gifting treats to the people I love the most.
Remember when you were a kid and everyone in your class would trade generic cartoonish Valentine’s cards, usually with a lollipop taped to the back? Imagine how much fun it would be to surprise your closest friends this Valentine’s day with some homemade treats and a sweet note! It’d be like grade school all over again, except more delicious, and way more meaningful.
If we’re going to be upgrading the Valentine’s day experience, think for a moment about one of the most cherished, beloved childhood snacks. Something you’d always try to trade for at lunchtime. Something crunchy and creamy at the same time. Something that went perfectly with the tiny cartons of ice-cold milk from the cafeteria.
Yup, you guessed it: Oreos!
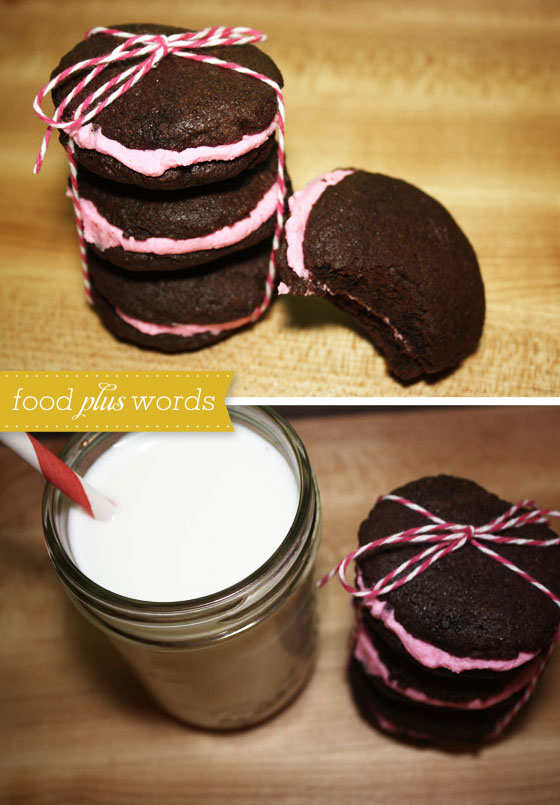
Who doesn’t love Oreos? That’s right, no one. Making them yourself is so simple, and the end result is so much more delicious than the store-bought variety! They’re nostalgic, charming, and your friends will absolutely love them, guaranteed!
Whether you’ve got a steady Valentine, a secret admirer, or just amazing friends, I hope your Valentine’s day celebration is full of happiness and love.
See you next month!
Sweetly,
Jaclyn | www.foodpluswords.com
/////
homemade oreos
adapted from retro desserts by wayne brachman
yield: 25-30 cookies
special equipment necessary
sheet pans
parchment paper
teaspoon-sized portion scoop (a regular teaspoon will work just fine!)
mixer with a paddle attachment (or a spatula and strong arms)
sifter
what you’ll need
chocolate wafer cookies:
1 1/4 cups all-purpose flour
1/2 cup unsweetened dutch process cocoa
1 teaspoon baking soda
1/4 teaspoon baking powder
1/4 teaspoon salt
1 cup sugar
1 1/4 sticks room-temperature, unsalted butter
1 large egg
1 tsp. vanilla
1 tsp. brewed coffee or espresso, at room temperature
filling:
1/2 stick unsalted butter, at room temperature
1/4 cup vegetable shortening
2 cups confectioners’ sugar, sifted well
2 tsp. vanilla extract
1 tbsp. heavy whipping cream
3-4 drops food coloring, if desired
what you’ll do
preheat the oven to 375 degrees F.
in the bowl of an electric mixer (or by hand, if you’re hardcore), beat the butter until light and fluffy, about 1-2 minutes. add the sugar, and beat for another minute. add the egg, vanilla, and coffee; incorporate thoroughly.
sift the flour, cocoa powder, salt, baking powder, and baking soda together. add this flour mixture to the rest of the ingredients just until the dough comes together.
using a portion scoop or a regular teaspoon, drop the dough onto the sheet pan, leaving an inch or so between each cookie.
wet your hands with cold water. using the heel of your palm, flatten each cookie scoop until it’s about 1/4” tall.
bake for 9 minutes, and then cool completely on a cookie rack.
while the cookies are cooling, let’s make the filling, shall we?
we’re going to use the electric mixer with the paddle attachment, or a spatula and some elbow grease to beat the butter and shortening until they’re light and fluffy, about 2-3 minutes. slowly add the sifted confectioners’ sugar a little at a time, otherwise you’ll be covered in the stuff. once the confectioners’ sugar is totally incorporated, add the vanilla and heavy whipping cream, and mix until just combined. if you’re using food coloring, add it now!
once your filling is creamy delicious, it’s time to make some cookies!
if you’ve got a pastry bag and a 1/2” round tip, use it to deposit generous teaspoons of filling on one cookie. don’t have a pastry bag? no worries, just put your filling in a zip-top plastic bag, seal, snip one edge of the bag off, and pipe your filling out that way.
make sure to pipe your filling in the center of each cookie, so when you place the second cookie on top and press down, the filling is spreads out evenly.
once all your cookies are filled and sandwiched, enjoy them with a tall glass of milk (i vote for chocolate, but that’s just me), and share them with someone you like a whole lot.

One comment